This is always how these projects get started...my kids. On Friday I took my kids to 7th Generation farm, here in Louisville, Colorado to go pick out some pumpkins. This little farm is awesome. They have chickens, horses, pigs, sheep, cows, yaks, goats...just about every farm animal imaginable. Not only do we get a little tractor ride to and from the pumpkin patch but my little animals get to commiserate with other little (and some big) animals, it’s a children’s paradise! If you’re in the Denver or the North Metro area, there’s seriously something for the whole family, definitely take the kids and support this local family run business.
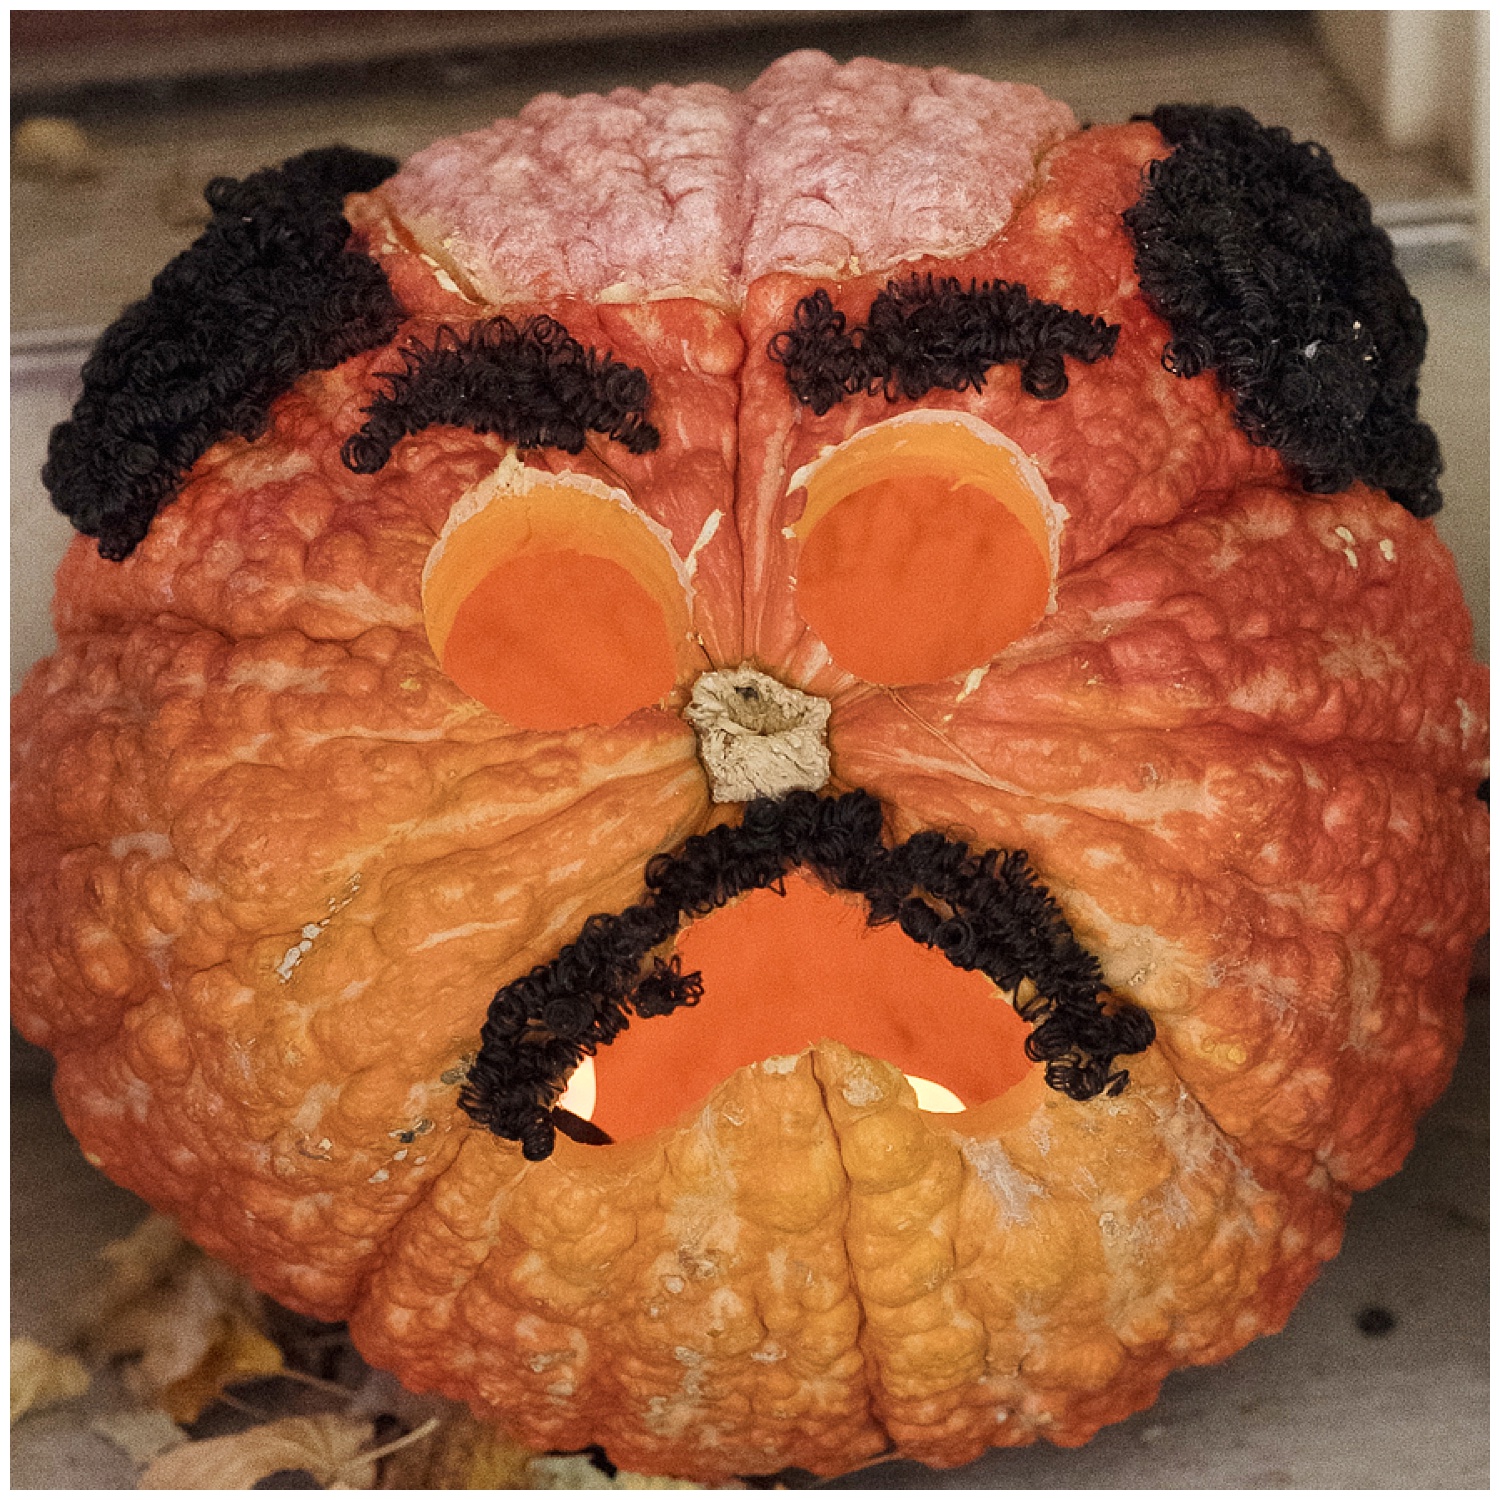
When we got there my oldest proclaims that he wants to find the ugliest, nastiest, grossest looking pumpkin of all. This is a new twist. My kids have never really been into gore, or super scary costumes but I rolled with it. After looking around the patch, my kid was not happy with the lack of super gross pumpkins because “they all just look like regular pumpkins”. He finally unhappily settled on one super average and clearly sub par pumpkin. We go to pay and they have all their pretty gourds out by the register displaying in oranges, yellows, greens and reds. There were plump friendly white pumpkins sitting next to oddly shaped gourds, next to something fairly hideous and bumpy. He nearly dropped his previous selection while walking over to a hideous beast of a gourd, almost entranced yelling “brains, BRains, BRAINS! MOM BRAINS!”.
Naturally I bought it. Along with its buddy, an acorn shaped green gourd and a pale pink squatty bumpy friend. They were a motley crew but as I sat there staring at them I had already decided which fate was destined for the gourds before we even made it back to our car.
Before I can begin to show you what I did, I must first show a little video...
I think we can all agree that any kind of carving whether it be pumpkin or gourds is better with power tools. In this case it was mandatory because guess what? Gourds are way thicker and more dense than your regular pumpkins! My little brainy friend, was up to 2 ½ inches deep! My husband used a combination of a drill, a dremel and about 4 different types of bits and attachments. To say I was commitment to this project is an understatement. Begrudgingly my husband, who is never one to back down from a craft challenge, was too. He didn’t want to do it but I always seem to rope him into my art or craft projects.
Once we got him emptied out (surprisingly a lot less gooey than pumpkins) and his face cut out the next step was to make the brains look real. All it took was thin layer of peach paint and little clear mod podge to make that gray matter glisten. Next, the final piece...as in hair piece. Of course my cranial friend needed hair, specifically dark, curly hair coupled with dark curly eyebrows and a porn ‘stache because at this point, why not? I give you Carl.
Now on to his friend Frank. I took one look at this little green guy and in about a nano-second envisioned exactly what I was gonna do with him, Frankenstein of course! This guys was the most dense out of all them but he really has won my heart. The best part is when you puncture the green skin with a knife it gets even greener and looks like a real cut, which turns out really plays nicely with the whole “stitched up a monster made from scratch” theme. I didn’t have to worry about any imperfect cuts because they just looked like real stitches. I painted the top and literally screwed in some bolts on the side, and I’ve got my little smirky Frankenstein!
Lastly, I worked on my pink little pretty. This one had the most perfect shade of pale pink. When I picked it up and saw all the bumps, they reminded me of roses. And the idea of rose gold popped in my head. My husband calls this the disco pumpkin. This one was the easiest to carve and make because it didn’t require a face and was more of a fun design. I drilled little holes all around it, then put hot glue all over the bumpy parts and poured gold glitter over them.
Before I did this I made what I called a “glitter station” and it’s perhaps one of my most genius ideas ever. Just take a box large enough that you have space to work in put a big garbage in it and over the sides, then glitter away! Has to be the cleanest and easiest time I have every used glitter in my life. I’m not saying it isn’t still all over my house somewhere because we all know that glitter is insidious but I can’t see it...which to me means it’s not there.
We had some strips of LED lights that change color and we weren’t using them so I plopped them right into my disco pumpkin. There she is, isn’t she fun?
The colored lights make it look like it's gilded jewel encrusted pumpkin, the light blue being my hands down favorite color.
Here's what it looks like when the colors fade in and out and change colors.
Have you done some cool Halloween pumpkin styling and designing this fall? Made or created some fun Halloween kids craft or art projects? Share in the comments below- I want to see them (and so do Carl and Frank)!!!!
Have a fun and safe Halloween!
Have questions about the materials or tools I used? Drop me a line, I'm happy to help!


